BMW X3 F25 LCI Climate Control Retrofit - Time to Get Fancy!

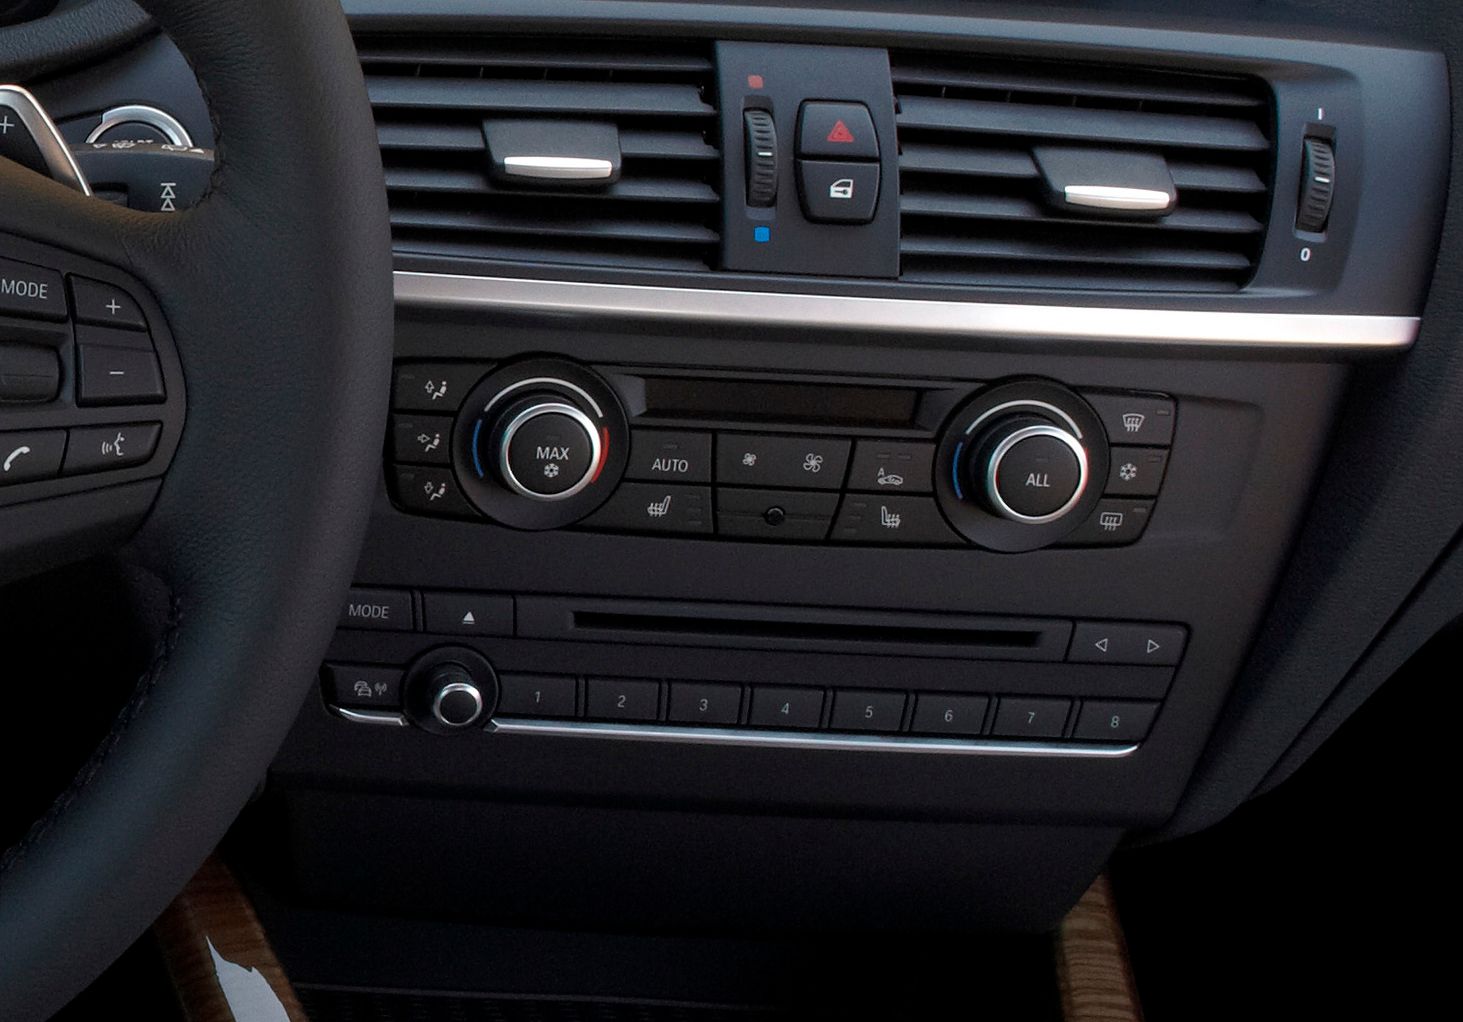
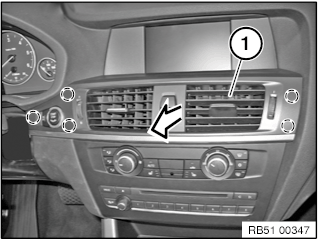
Look, I get it. When you hop into your pre-LCI X3 F25, that climate control/audio panel stares back at you like it's fresh out of 2007. Kinda feels like the BMW designers were rushing to a beer fest and thought, "Eh, just toss in the old E90 controls, no one will notice!" Well, we noticed.
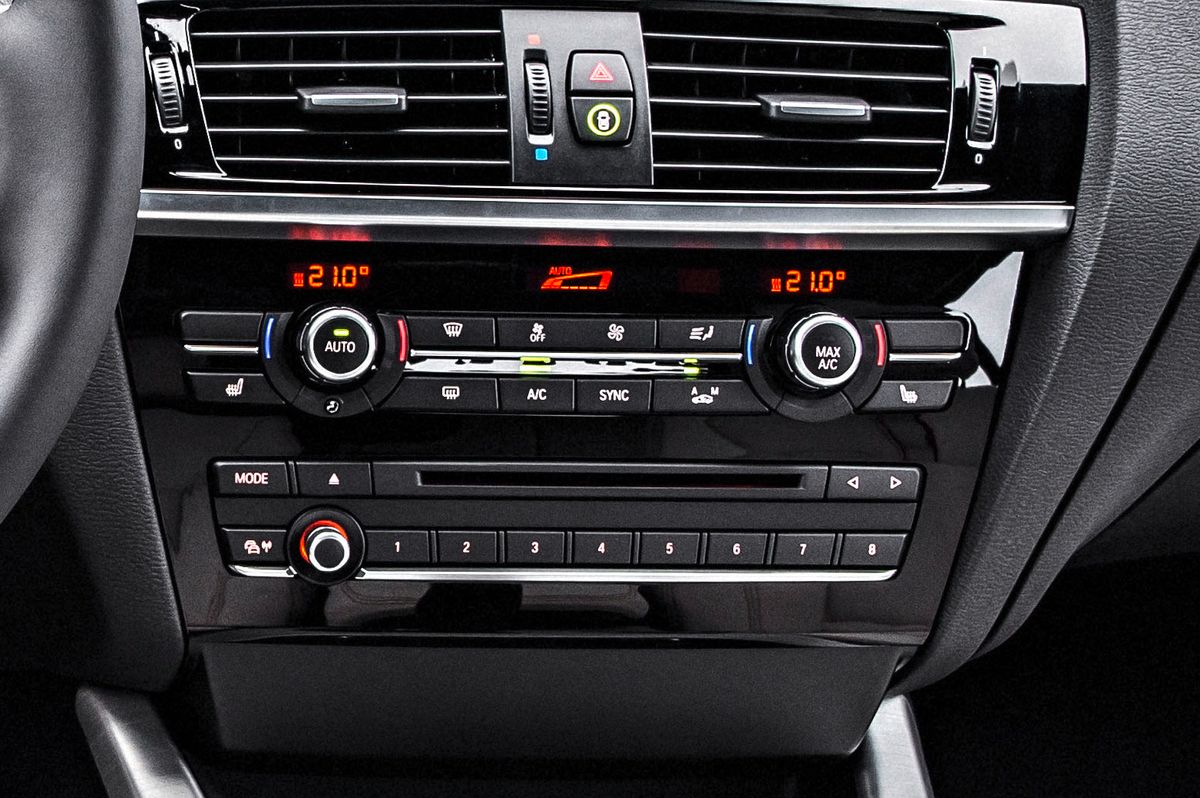
But hey, don't fret! BMW did eventually find its mojo and gave the X3 F25 LCI a proper, high-gloss, dedicated climate control panel. And the best part? It's plug-and-play, baby! No PhD required.
Oh, and before you ask—yes, the radio control is still the same. But now, your climate control won't look like it's from your granddad's E90.
Ready to give your X3 some TLC? Let's dive in!
Step 1: Out with the Old!
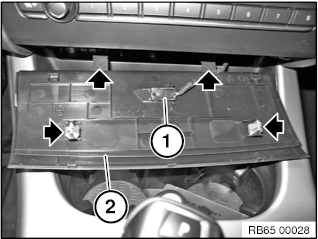
- Carefully unclip the trim at the marked points. Spoiler: You won't need any fancy tools.
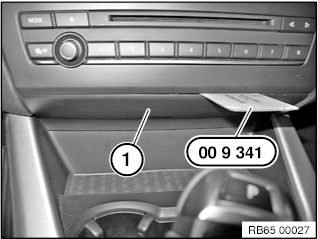
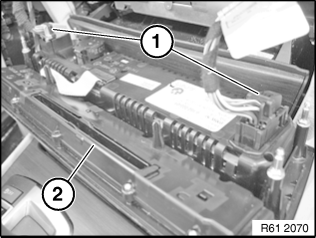
- Unplug connectors (1) and (2), and gently remove the strip.

- Using the super-special tool 00 9 340 (or 00 9 341), lever the trim cover (1) forward and unclip.
- Unclip the LED (1), and bid adieu to cover (2).
⚠️ Pro Tip: Be careful with those retaining lugs and clips. They're more sensitive than a cat on a hot tin roof.
- Grab your Torx T20, unscrew the 4 screws (arrows), and gently slide out the control panel.
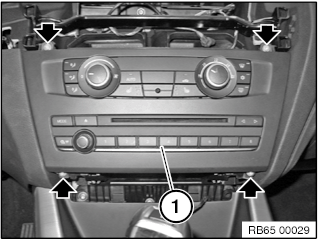
- Move the control panel (1) towards the front, unplug connections (1), and finally, remove the radio and A/C control panel (2).
Step 2: In with the New!
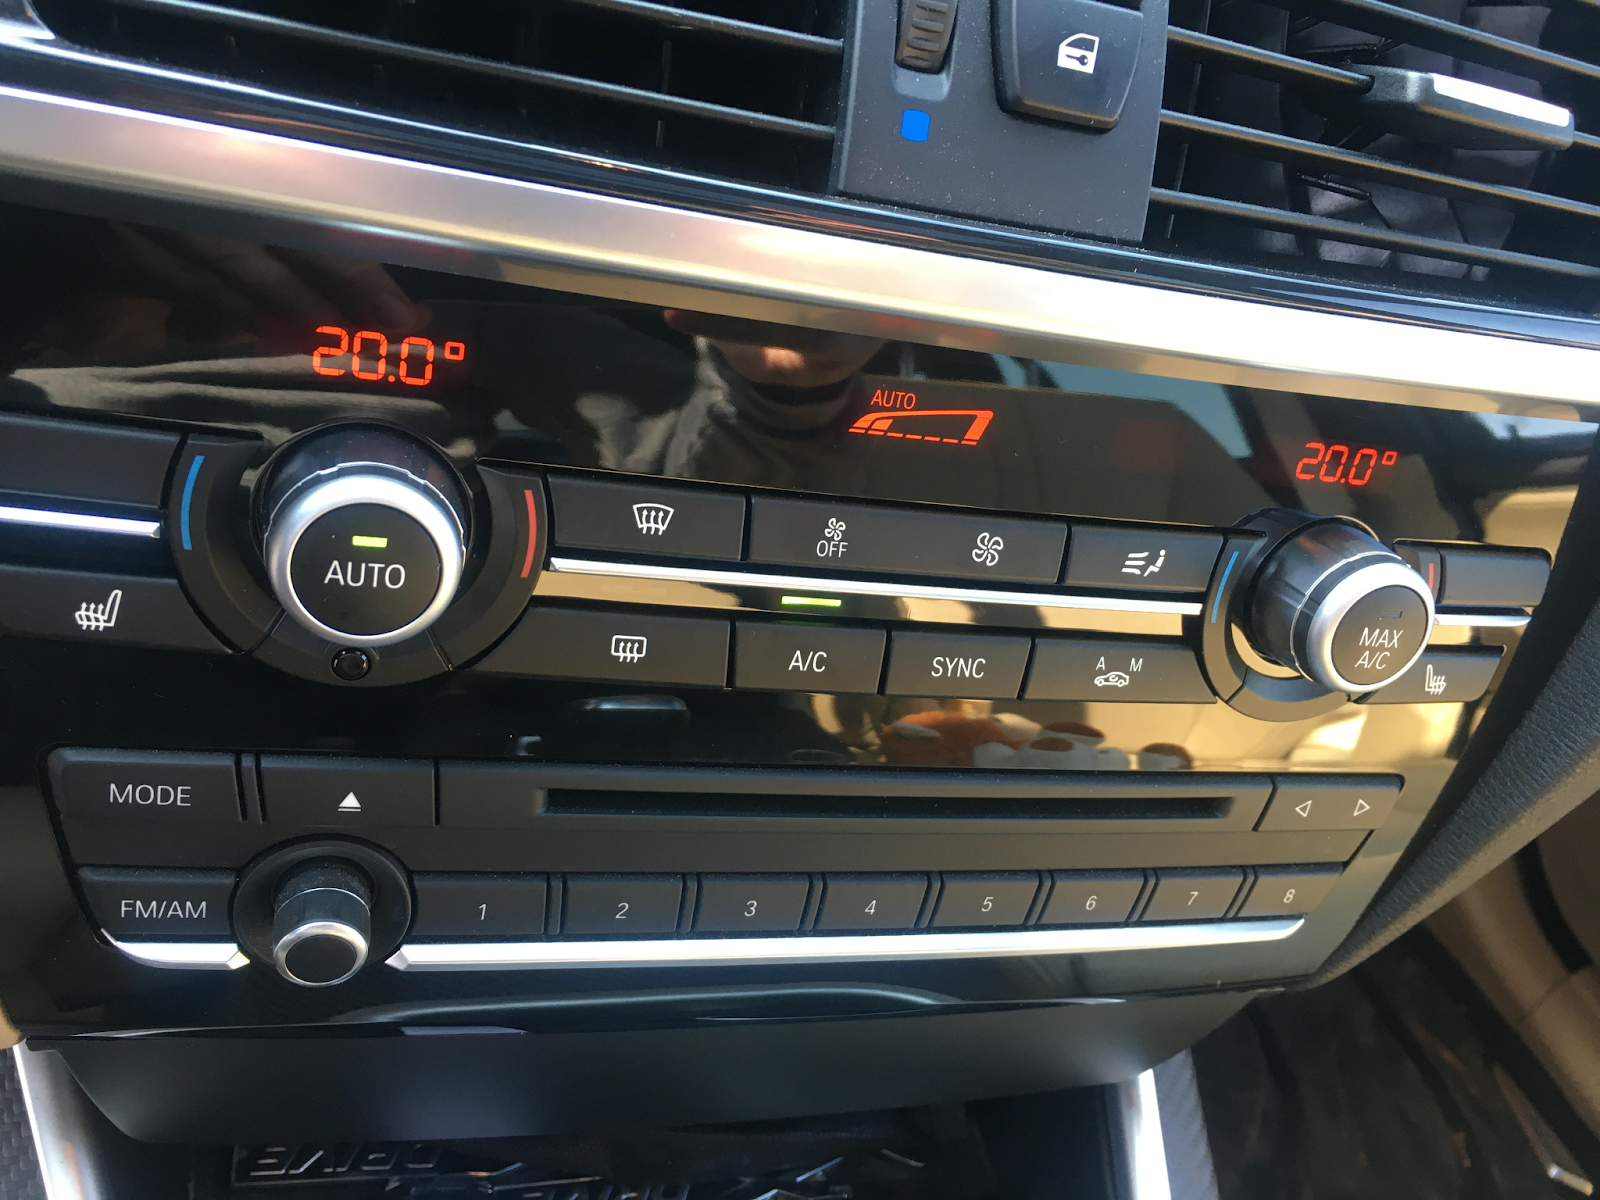
Slap in that shiny new LCI panel. It's like giving your X3 a face-lift without the surgery!
Step 3: Talk to Your Car (aka Coding)
- Connect to your vehicle: F025.
- Read FA, then activate FA, followed by a quick read of the ECU.
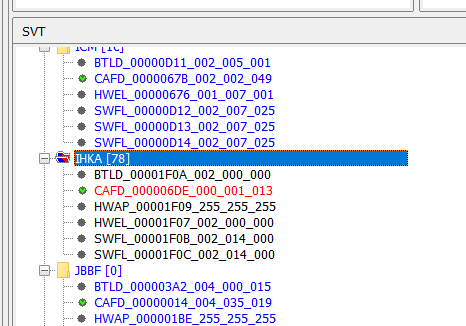
- Does IHKA have a CAFD file? If yes, right-click on IHKA and hit "Code". If it's acting shy and there's no file, click “Detect CAF for SWE” and pick the latest pop-up option. Then, right-click IHKA and choose "Code".
💡 Did You Know? A brand-new control unit may not have a CAFD file. But if you're recycling like a champ with a used unit, the CAFD should be there (unless someone decided to play hide and seek with it).
Fun Fact! (Because, Why Not?)
When you install a new IHKA control panel, the LED on the A/C button does a little dance. This flashing means the compressor protection mode is on. Think of it as a warm-up before the big game. After around 90 seconds (or less than 1500 rpm), the LED stops its rave, indicating the A/C compressor is now in the game.
But remember, if it's colder than a polar bear's toes outside, the A/C might not constantly work. So, the LED might keep flashing longer than expected.
Solution: Let the A/C run with the engine idling until that flashy LED calms down after installing the new IHKA panel.
And there you have it! A climate control that's as fresh as your morning coffee. Until next time, retrofit responsibly! 🚗💨